
After much effort and testing, our team has developed the perfect guide for How To Make A Leather Wallet. Our leather wallet will even include a magnetic money clip and it will be entirely made by hand (no heavy machinery needed, just a few tools from around the house).
If you want to also make your own leather wallet, read on…
Quick note: We are pleased to welcome guest creator Skyler Blair. He makes everything from artisan knives, leather works, sculpting, pottery, gardening or you name it! You can find his creations on Instagram under the name of @skythemaker.
Jump Ahead To:
See below the sneak peek of the leather wallet you will have after you finish all the steps laid out below here!

The Leather Wallet Construction
After years of service, this wallet-money-clip has completely worn out.
It’s a great idea to secure credit cards, driver’s license, and a few key bills all together.
The finished wallet is thin, compact, and easily slides into a pants pocket. This easy and fun project was worth the time and effort to recreate such a useful wallet.
Step One of How to Make a Leather Wallet: Supplies and Measuring
- Metal embossing letters (optional)
- Tin cutting shears
- Pair of flat magnets
- Leather scrap pieces
- Waxed string
- Glue JB Weld 2 Part Epoxy
- Leather sewing needle
- Pencil
- Jewelry clippers, wire clippers or sharp scissors
- Sandpaper
- Electric belt sander (optional)
- Electric drill press (optional) or drill or awl
- Burnishing tool: a piece of notched wood or notched antler


Step Two of How to Make a Leather Wallet: Cutting the Leather
Cut each piece out using shears that will go through thick material.

Cut one piece of the money-clip leather slightly larger than the long strip of money-clip leather. This will be the bottom of the money-clip sandwich and the portion that you will stitch onto the wallet.

Step Three of How to Make a Leather Wallet: The Magnetic Clasp Assembly
Take one magnet piece and glue it inside the long piece of the money-clip sized leather with the short piece on top. Clamp all four edges and let it sit for one hour.

Here I used a tool that I had handy to mark where I want the holes to be drilled. The goal is evenly spaced holes.

A drill press is handy for this step because you are drilling through two layers of leather plus the glue.

Cut 2 pieces of waxed twine about 40 inches. You’ll have excess, but better safe than sorry. Thread a leather needle on each piece and insert one end into your starting hole and insert the other piece into the starting hole coming from the opposite direction.
See video demo below. Pull until you have two stubs about the length of the picture below.

Continue threading needle through the next hole, each string repeating the insertion step above, BUT don’t pull tight yet.
Create the knot: Before pulling tight on your second stitch, wrap both tails into the second stitch loop.
Now create your third stitch and wrap the remaining tail ends into the third stitch loop.
Then pull tight, which will anchor the ends and create a knot.
See video for trimming and pulling:


Continue around the money-clip, criss-crossing and pulling after each stitch.

End tie off:

This is better understood by watching the video!:
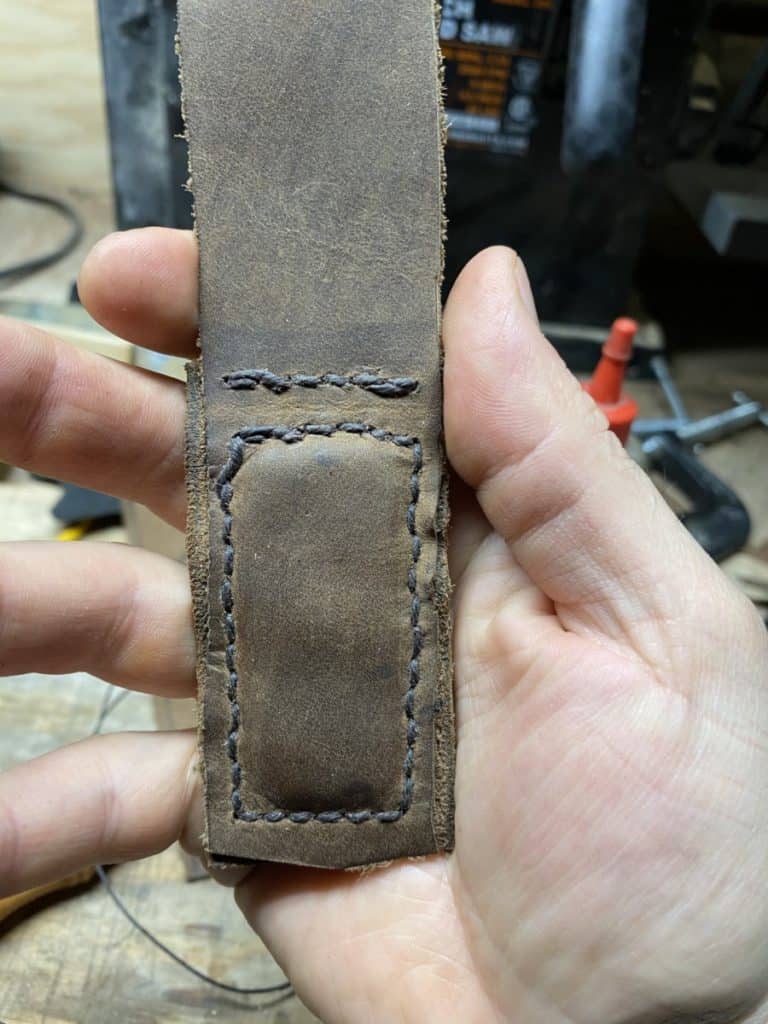
Finished money-clip.
Sand the four edges with sandpaper or a belt sander with 400 Grit.
Burnish edges with a burnishing tool, here I made notches in a small piece of antler that I had handy. Typically, this is done with notched wood.

To make the leather more pliable, wet the leather at the crease and clamp it in a vise for about one hour.

Step Four of How to Make a Leather Wallet: The Wallet
Adhering the money-clip to the back of the wallet:

Create more tooth for the glue to grab onto by sanding down the area where the other magnet will be located. Glue the other magnet to this area.
Glue the free flap of the money-clip onto this section, with the magnet inside.

Stitch magnet flap to the back of the wallet.
If desired, emboss initials on the front of the wallet using metal dies.
Put a thin line of glue on the seams of the two outer sides of the wallet and clamp it using wood pieces to keep from embossing the leather. Let dry for one hour.

Repeat sanding steps and burnishing.


Repeat the stitching process for the outer seams of the wallet.


Conclusion and Special Thanks to Our Guest Leather Wallet Creator
We hope you have enjoyed this step by step tutorial about how to make your own leather wallet with a magnetic money clip. Please let us know if you have any questions!
Thank you to Skyler Blair for this great tutorial about how to create a leather wallet. Look for new tutorials from him at VeryCreate and follow him on Instagram for all his latest work!
Come back to VeryCreate each month for new projects and design ideas. We always have something new for you!